Have you ever looked at the amount of sugar & sodium in most instant oatmeals? But who has the time to make a pot of “real” oatmeal on a busy school day morning while hunting for socks, & locating homework & smelling (yes I said it!) teenagers before you kick them out the door in time for them to mope off to their bus stops?!
Well, you guessed it! Just like my frozen waffles…I make my own “instant” oatmeal!
A little about oats…
Steel-Cut Oats – We get steel-cut oats when the whole groat is split into several pieces. Simmered with water, steel-cut oats retain much of their shape and make a chewy, nutty porridge.
Rolled Oats – Whole grains of oats can also be steamed to make them soft and pliable, and then pressed between rollers and dried. The resulting “rolled oats” re-absorb water and cook much more quickly than whole groats or steel-cut oats. When a recipe calls for “rolled oats” or the packaging mentions it, they generally mean the thickest rolled oat, which retains its shape fairly well during cooking.
Old-Fashioned Oats – The source of much confusion, old-fashioned oats are actually the same as rolled oats. You’ll usually see them called “Old-Fashioned Rolled Oats” on packaging.
Quick or Quick-Cooking Oats – These are oats that have been pressed slightly thinner than rolled oats. They cook more quickly, but retain less of their texture.
Instant Oats – Pressed even thinner than quick oats, instant oats oats often break into a coarse powder. They cook the quickest of all and make a very soft and uniform mush.
I tend to use “quick oats.” I can find organic quick oats in the bulk section of our local grocery store & our natural food stores, I can never find organic instant oats. Also, if you are a “real” oatmeal fan, & you don’t over water your oats, quick oats can have a similar texture to the whole grains your used to, especially with some mix-ins. I don’t think you can EVER say that about instant oats! You can use “rolled oats” with these recipes too, just keep in mind, the further up the “oat food chain” you travel the less quick your prep time. (If it’s going to take you more than 5-7 minutes, you might as well use the stove!)
*Let me start by saying that ideally I wouldn’t be making packets. I am currently in the process of reorganizing my cupboards & pantries. So until I am finished, space is what it is. I prefer making these in jars. That way you can eat directly out of the jar, wash & sterilize it & make more. There is little, if any waste using this technique. I will say that making packets out of the snack-sized resealable baggies, I reuse the baggies over & over. You will see below that I write the flavor on the bag with a Sharpie, you don’t need to wash them just refill them, dump into the bowl or mug, reseal the bag & put back with the other packets until you make more (that way you won’t lose it).*
OKAY…Here we go!
First you need to get your space ready…I saw this on Pinterest & it has made these cooking projects so much easier…
Now, on pinterest, the woman had the hanger hanging from a cupboard knob. I was bummed at first because I don’t have knobs on my cupboards. Then I realized…I can hang it off of the handle to my suspended microwave! I worked perfectly! It allows me to glance up quickly & double check quantities of ingredients or measurements. Because the microwave is over the stove, I can’t really use this method for cooking like she meant it to work, due to fire safety, but for projects like this, it is perfect!
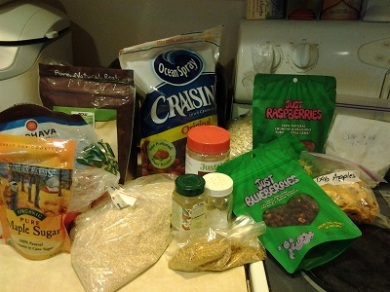
I usually take out all of my Ingredients to start with:
each packet (or jar) contains:
1/3 C quick oats 2 tsp oat bran 1-2 tsp dry nonfat milk 1 tsp chia seeds 1-3 tsp coconut sugar or maple sugar 1/8 tsp ground cinnamon
(I, personally, make it with 2 tsp dry milk & about 2 tsp coconut sugar for plain oatmeal. For making the flavors below, I only use 1 tsp dry milk & between 1 & 1.5 tsp coconut sugar as a base. The maple sugar has more flavor than the coconut, so I only use it if I want a maple flavor. You should mix & match & find your own preference!)
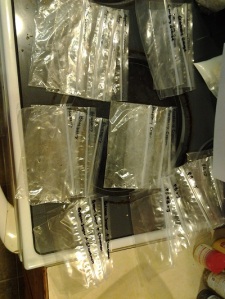
1st, I sort & label all of the baggies:
then I fill them all with the basics above (set aside the bags that have a different type of sweetener or a different amount of dry milk & do them last).
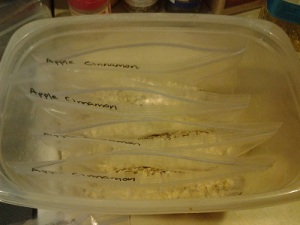
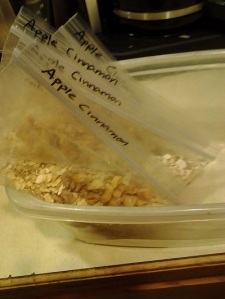
One flavor at a time, put the baggies into a rectangular container, like a loaf pan or plastic one, like this:
Now add the mix-ins below & set them aside.
Now you can move on to the next flavor!
I have found 8 flavors that my family enjoys:
Plain: (as mention above) use the full 2 tsp dry milk & 1-3 tsp sweetener of choice (I use coconut sugar).
Apple-Cinnamon: double the cinnamon & add 2 Tbsp chopped dried or freeze-dried apples.
Blueberry: add 2 Tbsp freeze-dried blueberries.
Cranberry-Orange: add 1 tsp dried orange zest & 2 Tbsp dried cranberries.
PB & J: add 2 Tbsp peanut butter powder & 2 Tbsp freeze-dried raspberries or strawberries.
Maple Nut: use maple sugar instead of coconut sugar & add 2 Tbsp of chopped nuts (I usually use either walnuts or almonds).
Brown Sugar & Cinnamon: use brown sugar as sweetener & double the cinnamon. (I like to add 1-2 Tbsp of ground almonds to this one too since it has the least nutritional value of the lot, shhh don’t tell).
Raspberry(or Strawberry) & Cream: use the full 2 tsp dry milk plus an additional tsp (total 3 tsp) & 2 Tbsp freeze-dried raspberries or strawberries.
{Note about fruit…I have found that freeze-dried fruit ALWAYS works better in these packets than dried fruit. Dried fruit usually has added sugar & it grows when it is hydrated. The freeze-dried fruit, & berries, stays about the same size when hydrated, is very easy to find natural (no sugar added), & has a nice texture in the oatmeal once reconstituted.}
To prepare: BOILING WATER METHOD: Pour the contents of the packets into a mug or bowl & add 2/3 C boiling water. Stir. Let sit for 2-3 minutes. [If you use rolled oats, cover & let sit 4-5 minutes (you may need more water)]. MICROWAVE METHOD: Pour into microwavable container & add 1 C cold water. Microwave on HIGH for 2 minutes, stir, then let sit for 2 minutes.
If you are using jars: simply add the boiling water, stir, let sit & enjoy! (Of course be careful when you pick it up! I always tell my kids to put a plate or a saucer under any bowl or jar that will have hot contents, before it is heated, just in case it is too hot to pick up.)
Here’s a few links about the benefits of some of the ingredients I choose to use:
- Chia Seeds: http://www.mychiaseeds.com/Articles/Top10ChiaBenefits.html
- Oat Bran: http://www.naturalwellbeing.com/learning-center/Oat_Bran
- Freeze-dried Fruit: (nutrition info): http://www.foodqualitynews.com/Innovation/Chilled-fruit-loses-80-of-antioxidants
- Cinnamon: http://www.medicalnewstoday.com/articles/266069.php
I do my best to use organic ingredients, natural when I can’t find organic. I buy most things in bulk, as well. Coconut sugar & Maple sugar are still sugars (like honey), but if you find organic, they are natural & your body processes them differently than white sugar. If you are diabetic, you should use stevia instead if you choose to use a sweetener. With fruit, cinnamon, or a little vanilla, you may not need a sweetener at all. My kids were used to the boxed instant oatmeal, so we’re working our way from white sugar, to natural sugars & sweeteners, & eventually out of needing as much sugar at all. Use what you feel you need to for your family.
I hope you find that these make your mornings more nutritional (& run a little more smoothly).
If you come up with any new flavor combinations please post them in the comments below! I look forward to seeing what you come up with!


